Now a days WhatsApp is the heart of every Smartphone, every user who have Smartphone is using WhatsApp. Most of the time your Smartphone freezes due to application processes or due to hanging problem you have to reset your Smartphone, in this case your all apps restored to default. And your important chats and other important data deleted from your Smartphone. It’s really irritating. So, today in this article we will going to see how to recover deleted WhatsApp messages from your Smartphone.
Ultimate guide to recover deleted WhatsApp messages:

The good news for all WhatsApp user:
WhatsApp is the very secured app and doesn’t save your chat history on any servers because it wants to keep your chats private, but it doesn’t mean that you can’t recover a messages you have accidentally deleted. WhatsApp makes regular backup which is stored on your SD card but restoring from those backups is really simple? No, because it completely freezes app if the database is very large.
On Android Smartphone, WhatsApp automatically backs up your all WhatsApp message history every night at 3AM and stores that backup in the WhatsApp folder on SD card. Depending on your device and its settings, that folder could be in the phone’s memory or it could be on the SD card. It might even be backed up on Google Drive.
There are two methods to restore messages. The first will restore your most recent backup, and the second is for recovering older messages.
To restore your most recent backup:

-
Uninstall WhatsApp from your Smartphone
-
Reinstall WhatsApp
-
Click on Restore button when prompted to restore your chat history
-
Wait a few seconds
-
And your all messages get restored
However, You must have to keep these three things in your mind. One, your phone number must be same when you backed up your chat. Two, if you’ve deleted the backups, then you’re stuffed. And three, your backup can’t be ancient.
Ultimate guide to recover deleted WhatsApp messages on Android: restoring older backups
By older means days, not months: WhatsApp has a limitation to make backup of only last seven days. Anything older than last seven days is lost, and anything sent or received since the backup was made won’t be included either: restoring from the backup is a full restore and overwrites whatever is currently in the app.
To continue, you’ll need a file manager app which will be used to find and rename files.
First you have to create a manual backup to preserve your recent chats. You can do that using the app’s menu button, go to Settings > Chats and Calls > Back up Chats.
This backup will be saved as msgstore.db.crypt8 in your /sdcard/WhatsApp/Databases folder. You might confuse, so save this file as msgstore.db.crypt8.current to recognize later.
To restore:
-
Uninstall WhatsApp from your Smartphone
-
Select the backup file you want to restore in /sdcard/WhatsApp/Databases
-
Rename it from msgstore-YYYY-MM-DD.1.db.crypt8 to msgstore.db.crypt8
-
Reinstall WhatsApp
-
Tap on Restore button when prompted
Ultimate guide to recover deleted WhatsApp messages on Android: using Google Drive:
If you stored your chats on Google Drive (which you can do in Settings > Chats and Calls > Chat Backup) then you can easily restore from that. Make sure you use the same Google Account to backup and restore the chats or the restore process won’t work.
The process is much the same as it is for local backups:
-
Uninstall WhatsApp from you Smartphone
-
Reinstall WhatsApp
-
Choose to restore your messages from Google Drive
-
Wait for a minute
-
That’s it
You can use the Settings > Chats and Calls > Chat Backup area of the WhatsApp app to specify how often it should back up to Google Drive, which account(s) should be backed up and which network to use. Remember that you don’t have a permission to access backups made with one Google Account from a different Google Account.
Same method work for iPhone and iPad users only difference is that you can use iCloud to store your messages or other data instead of Google Drive. You can read here How to backup you data on iCloud and how to restore your data from iCloud with iTunes.
Thanks for reading, I hope you like this article.
More from my site
 All-In-One toolbox : The Best Utility App for Every Android User
- Easy Guide to Understand Dofollow and Nofollow links
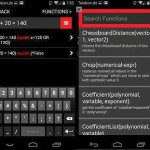
- How To Solve Mathematical Problem Automatically By taking Photo On Android
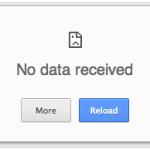
- Fix no data received Error Easily In Google Chrome
- How to Control Apple TV With iPhone
- Trick to Download and Install Cortana on Android Phones


Leave a Reply